When Roofing Repair Is More Cost Effective Than a Replacement
Roofing repair can be tricky. Often, a roof repair can be more cost-effective than a replacement.
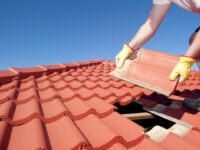
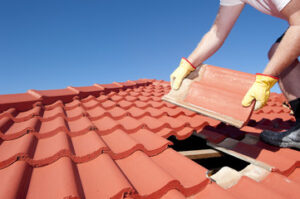
To assess roof damage, you need to visually examine shingles, gutters, roof edges, and flashing around chimneys and dormers. You also need Roofers West Chester.
Clear toys and furniture from the area around your house to allow roofing professionals to move safely.
Shingles sometimes come loose from their fasteners and fall off the roof. This can happen for a number of reasons, including age, high winds, people walking on the roof and poor shingle installation jobs. If a shingle disappears, it exposes the roof to water penetration that could damage your home. To protect your property, you should replace the damaged shingle as soon as possible.
When a shingle is missing, the surrounding shingles are exposed to wind, sun and moisture, which can quickly lead to other problems, such as leaks. If you notice signs of leaking on your ceiling, such as mildew, mold or stains, you may have a shingle problem that needs to be addressed immediately.
To fix a damaged shingle, climb onto your roof and locate the area where the shingle is missing. If the shingle is in good shape, you can simply replace it with one that closely matches the existing ones. If the shingle is torn or cracked, you can repair it by applying a thick bead of roofing sealant underneath it. Press down the shingle, then apply a second bead of sealant over it and spread it smooth with a putty knife.
While you’re on the roof, look for a nail in the first row of nails directly beneath the damaged shingle. Loosen the nails by sliding a flat pry bar under the shingle and lifting gently, working around it. Once you’ve removed the shingle, remove the nails in the first row of nails beneath it and the shingle below that.
As asphalt shingles age, their corners tend to curl downward or upward. These creases can lead to rainwater pooling on your roof, which can cause leaking and even structural damage. To prevent these creases, use a carpenter’s square and permanent marker to draw a line on the shingle just above where it starts to curl. Cut along this line with tinsnips, then remove the torn section of shingle.
Place a new shingle in its place, and then secure it with the nail that held the damaged shingle. Be sure to place the nail at an angle so it doesn’t puncture the shingle below it. Also, be careful not to walk on the new shingle, as this can cause it to puncture the adjacent shingles and tear them.
A roof leak is one of the most frustrating things to deal with as a homeowner, especially when it’s not obvious where it’s coming from. Aside from the damage it causes to your ceilings and the belongings in your home, a leak can also lead to mold and mildew.
While it’s best to let a professional do the repair work, there are some steps you can take on your own until they arrive. For example, you can make a temporary patch with plywood or shingles and roofing tar. First, spread the tar using a putty knife, then place the shingle or plywood over it. Finally, spread more tar around the edges of the plywood or shingle to seal the area and prevent water from seeping underneath it.
Another way to prevent leaks is by repairing damaged caulking around vents and other roof fixtures. This is a relatively easy DIY task and can save you the expense of having to pay for a full roof repair. Just dig up the old caulking with a putty knife and replace it. Make sure you use a waterproof caulk that is designed for your roof type (like silicone or rubber).
If you have access to an attic or crawlspace, you can sometimes find the source of a leak by following where the water shows up inside your home. Then, you can track it up to the source on the roof. This is particularly helpful when the leak is near a roof feature, like a chimney or skylight.
Many older homes have attics that are inaccessible, or have vaulted or cathedral ceilings that don’t have an attic at all. If this is the case for your home, you can still look for a leak by pushing back insulation and looking for water flow stains on the ceiling. Water often runs to openings in the vapor barrier, such as around ceiling light fixtures.
If you can’t find the source of a leak, try running a hose on the roof. Start at the bottom of the leak and soak the area in a circular pattern, working your way up to the spot where it appears inside your home. Keep in mind that this method is only effective when the leak is fairly close to a spot where you can easily access it from the ground or a ladder.
Flashing is a thin sheet of metal, usually galvanized steel or aluminum, that is installed on roofs to prevent leaks. It is designed to deflect water away from the creases and crevices where it could cause damage, and protect areas where shingles cannot be used, such as corners. It also helps reduce indoor mold problems by keeping water from leaking into the house.
Flashing can become damaged over time from normal weather exposure, or it may be a victim of a severe storm that blows off shingles and damages flashing. It can also develop rust spots or corrosion, and these can eventually lead to holes. It is important to watch for any signs of rust or corrosion, and have these repaired promptly, so that further damage can be prevented.
A roofing professional will carefully examine the flashing to check for any signs of deterioration. If there are any, the roofing professional will advise you on the best method of repair.
In some cases, the flashing may be replaced rather than simply repaired. This is generally only recommended when there is extensive rust or corrosion or if the flashing is no longer structurally sound. It is a complex process that involves removing the affected rows of shingles and exposing the flashing. This is typically best done by a professional, as it is easy to damage the underlying shingles when trying to remove them yourself.
For simple repair, it is recommended to use roofing cement or caulk to seal any gaps or cracks in the flashing. Then, apply a layer of flashing tape to the area and secure it into place. This is an excellent repair solution if you find minor flashing damage, or a small gap that needs sealing, and can serve as a temporary fix while waiting for the help of a roofing professional.
Before you start any repairs, make sure that the area of the roof is clean and free from debris, as well as being clear of rain or snow. It is also a good idea to choose a day when the wind speeds are low. This will ensure that the repair is carried out safely and that you are able to see clearly what needs to be done.
When it comes to a roof, there are times when replacement is the right option. When the underlying structures are damaged, the shingles are going bald and losing their granules, or it’s been a long time since your last roof installation, it may be time to have the entire roofing system replaced. It’s important to discuss the options with your contractor so that you get a durable new roofing system that protects the rest of your home. Unlike giving your home a fresh coat of paint or adding some cabinets, reroofing is a major project. It’s wise to plan the work during spring when roofing companies are less slam packed and can handle bigger jobs. Re-roofing is more expensive than repairs, but it’s also a more permanent solution.