Tips For Homeowners on Window Repair
Over time, window sashes can droop and strike the frame. Put on protective clothing, such as work gloves and safety goggles, to avoid being cut by shattered glass as you remove the sash.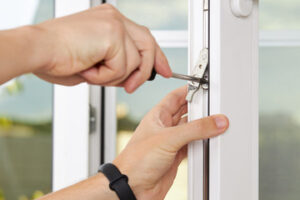
Too much putty can swell and cloud the new pane or push it from the frame, allowing drafts to enter your home. A better solution is to tape the cracked glass, stabilizing it and preventing additional breakage. For more information, visit https://www.handymannapervilleil.com/.
A cracked window doesn’t just let in drafts; it can also allow moisture and pests into your home. Luckily, you can repair cracks at home with some simple supplies. If the cracks are too severe to treat on your own, call a professional window repair service to replace the glass.
These at-home fixes may not get your window back to pristine condition, but they can prevent it from spreading and keep the cracks from getting bigger. Just be sure to address the underlying issue that led to the cracks in order to prevent them from returning.
One of the most common causes for cracked glass is a sudden shift in temperature. This can cause thermal stresses to build in the glass and lead to small cracks that spread outward. These cracks are often referred to as stress cracks, and they can be easily fixed by taping the glass and allowing it to cool.
More serious cracks are usually due to impact or a lack of proper installation. This type of crack has a starburst pattern with prominent spots at the point of impact and lines that extend from there. Unlike stress cracks, these are more difficult to fix and may require replacement of the entire window.
For a less permanent solution, try covering the crack with plastic. This will help to protect your home from wind, rain, and pests while giving you more time to find a more permanent option.
Another option is to use a strong adhesive, such as epoxy. This is commonly used to fix auto windows, and it will work just as well on your window. You can purchase it online or at most car maintenance stores, and follow the instructions to apply it to your glass.
For a more permanent solution, you should use two-part epoxy that comes with a resin and a hardener. Before you begin working, prepare your workspace by laying out cardboard sheets. Open the epoxy and mix it as directed on the product packaging. Once it dries, apply it to the crack and press firmly with a putty knife. Once it dries, wipe away any excess epoxy with a cloth moistened with acetone.
Leaks
If you hear dripping water in your window frames or notice a damp patch on the wall behind your windows, this may be due to an unsealed gap or broken seal. This is the most common sign of a window leak, and it can cause significant damage if left untreated. Water leaking around windows can lead to mold, mildew and wood damage. It can also damage wallpaper or linoleum and cause drywall to bubble or peel.
If the leaking extends beyond the window unit and affects the structure of the house, it is best to call in professionals for an evaluation. They can do a full evaluation of the structure and identify whether it makes sense to repair the window or replace it altogether.
Water leaks most often occur when the caulking or glazing starts to crack and peel away. If you notice this, it’s a good idea to remove the old caulking and apply a fresh layer of silicone caulking. Be sure to use a putty knife and clean the area before applying the new caulking.
Gaps less than 1/4 inch wide are easy to fill with caulking. You can purchase a tube of caulking at any home improvement store and follow the manufacturer’s instructions for application. It’s important to caulk around your window on a regular basis. In addition to preventing leaks, it also helps protect the finish of your window from weather.
Staining at the top of your window frame may indicate mistakes were made during installation. The flashing may be improperly installed or could be missing entirely. Incorrectly installed house wrap can also lead to leaks.
If you find a gap or crack in the cladding or siding of your house, be sure to contact a professional for a complete evaluation and inspection. It is a good idea to call in a professional when you suspect issues with the exterior envelope of your home, including the foundation, outer walls, roof and doors. A professional can ensure that all areas are properly sealed and insulated to prevent drafts and leaks.
Sashes
Wooden window sashes often swell or shrink due to changing weather conditions, causing them to become stuck in their frames. This is a common problem that homeowners experience, and it can be difficult to open or close your windows. A professional can help you with a window replacement that will solve the issue.
You can save future window repair costs by regularly inspecting your sashes for signs of mold, mildew and rot. Wooden window sashes aren’t particularly demanding in the maintenance department, but it is important to regularly inspect them for issues. This will prevent them from becoming rotten and moldy, and will also keep air leaks at bay.
If your sashes don’t slide up and down easily, it may be time for a replacement. This is a simple fix that is relatively inexpensive, but it will make your windows look brand new again.
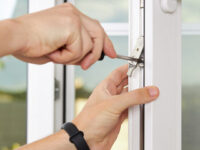
To replace the sash, you’ll first need to remove it from the frame. This can be done by unscrewing the metal tabs that hold the sash in place. Once you’ve removed the sash, you’ll need to mark where the metal tabs were on the window frame so that you can align them properly when installing the new sash.
When replacing the sash, make sure that it is aligned correctly by using a nail or screw to temporarily nail the staff bead into the frame. This will prevent the sash from falling and damaging the window. After the sash is replaced, it’s a good idea to treat it with a homemade wood preservative. This will prevent it from rotting, and will protect it from the sun’s harmful UV rays.
If the bottom sash doesn’t move up and down, it could be because the cord is broken or because the counterweight is off balance. This is a simple fix, but can be difficult if your window has an old jamb that is held in by a parting strip. To get to the counterweight, you’ll need to remove the access panel in the sash channel of the frame. Start at the sill and work your way up with a broad chisel to loosen the nails.
Frames
A frame is the outermost structure that holds glass or other material in a window. Frames can be made from wood, metal, or another material such as plastic, and they may have an intricate or simple design. Frames are generally finished with a coat of paint or other coating to protect the surface and make them attractive. Occasionally, frames may become damaged and require repair. If the damage is limited, the frame can often be restored with minimal effort. However, if the frame has broken into several pieces or is warped, it will probably need to be repaired by a professional.
The first step in repairing an old frame is to deep clean it. Using a clean towel, wipe down the frame with a non-flammable grease solvent or dry cleaning fluid. These products are typically made with acetone and can remove residues, grease marks, and other stains without damaging the frame. You can also use nail polish remover containing acetone, but this should be used with caution as it can damage the finish of wooden frames.
Once the frame is cleaned, it can be restored with a coat of stain. If the frame is in very poor condition, it might need to be sanded down before applying a new coating. You can also repair nicks and gouges by sanding the affected area until it is smooth and then applying a coat of stain or varnish.
If the frame is bent or ill-fitting, it can usually be adjusted at home. To reshape metal frames, heat can be applied to soften the metal and make it easier to bend. Plastic frames can also be heated, but this must be done carefully to avoid breaking the frame. It is important to always use a pair of pliers with plastic-covered ends, as these are less likely to damage the frames.
Depending on the style of the frame, you can also resew it together by perforating the two parts with a drill bit and then threading them with nylon string or another type of durable thread. This can be a time-consuming project, but it will give you a like-new frame that is strong enough to support your artwork.